How-To-Sheets
Steps to add email signature to Outlook Online
Swapping to or just using the new Outlook for the web?
Let’s add your email signature to the new Outlook for the web.
After you log in to Outlook for the web, follow these steps:
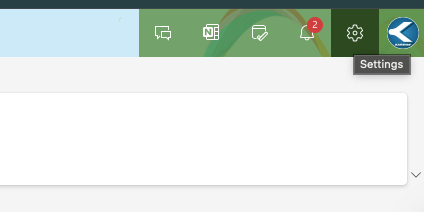
- Click on the Settings gear icon in the top right corner of the screen.
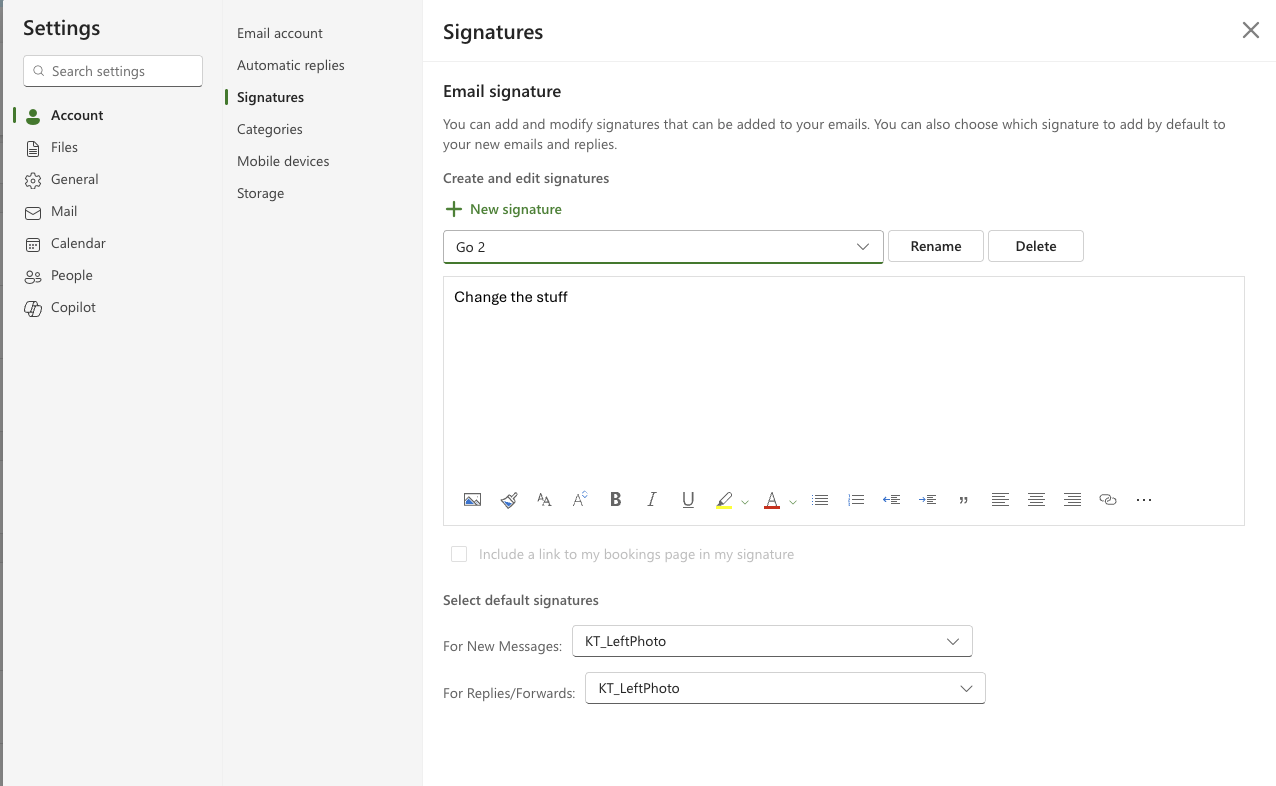
- In the Settings menu, click on Account » Signature
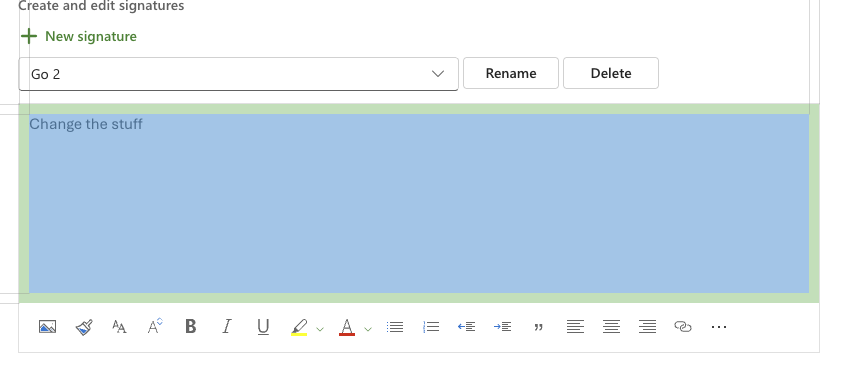
2a. It could be easier to find the code in later steps to add a short text in the text box.
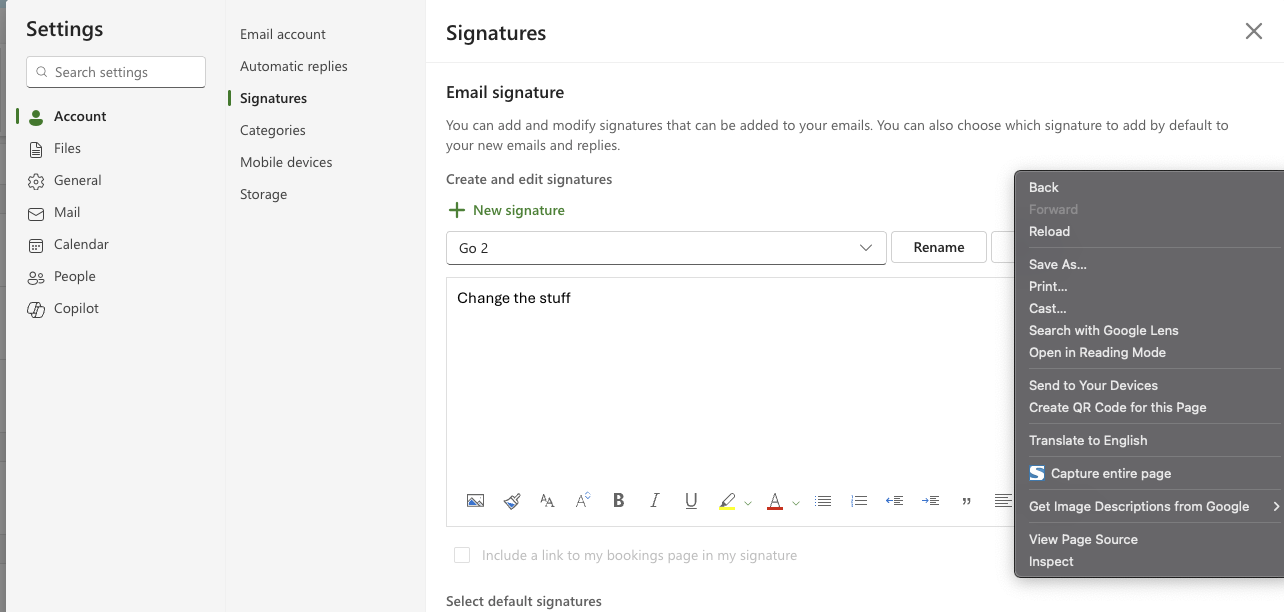
- This part is awkward because the signature editor is not very user-friendly. Left-click OUTSIDE the text box, then click the inspect menu item.
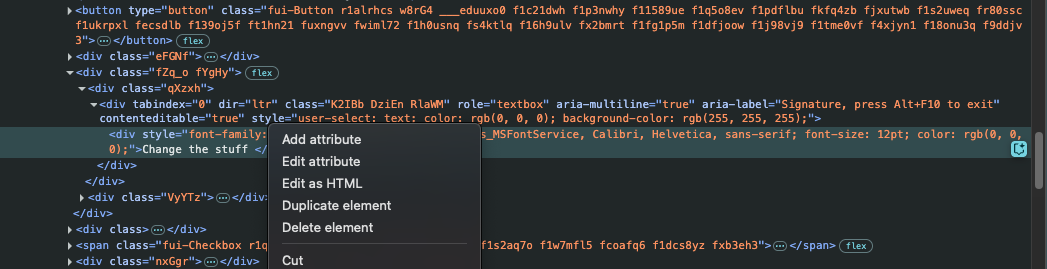
- Now you will be a coder for a moment. In the developer tools, find the “Element Selector” icon (a cursor inside a square) and click it.
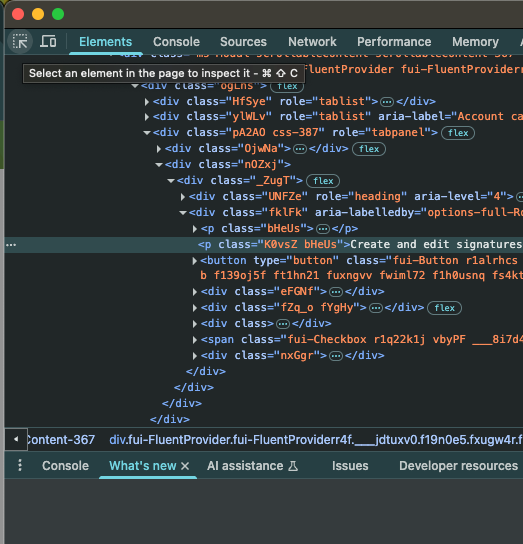
- Click on the edge of the text box where you add your signature. This will highlight the HTML code for that element in the developer tools.
- In the developer tools, click on the arrow to “open” the highlighted element.

6a. This will show you the HTML code for the signature box. Right-click on the highlighted code and select Edit as HTML.
- Now you can paste your HTML signature code into the text box that appears. Make sure to replace any existing content.
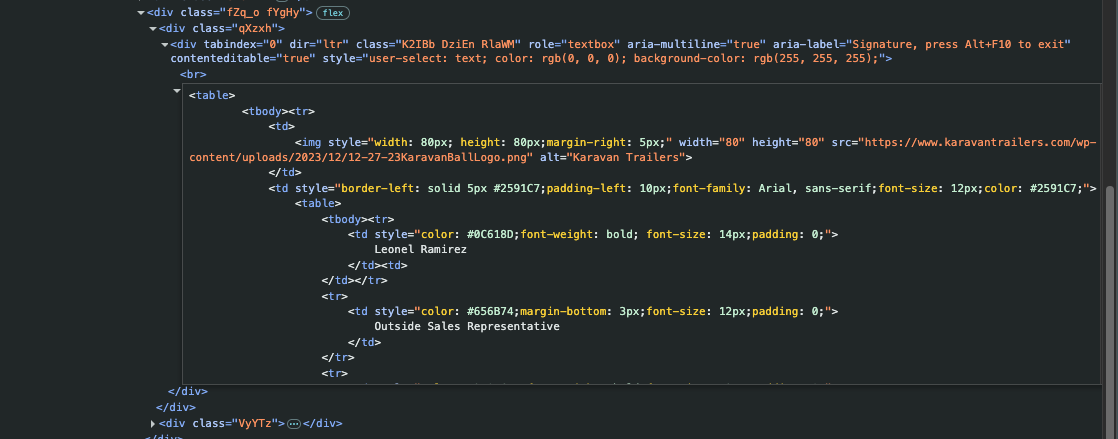
- After pasting your signature code (replacing the
<div>to<div>with<table>to<table>), you can close the developer tools. Then, click Save in the Outlook signature settings.
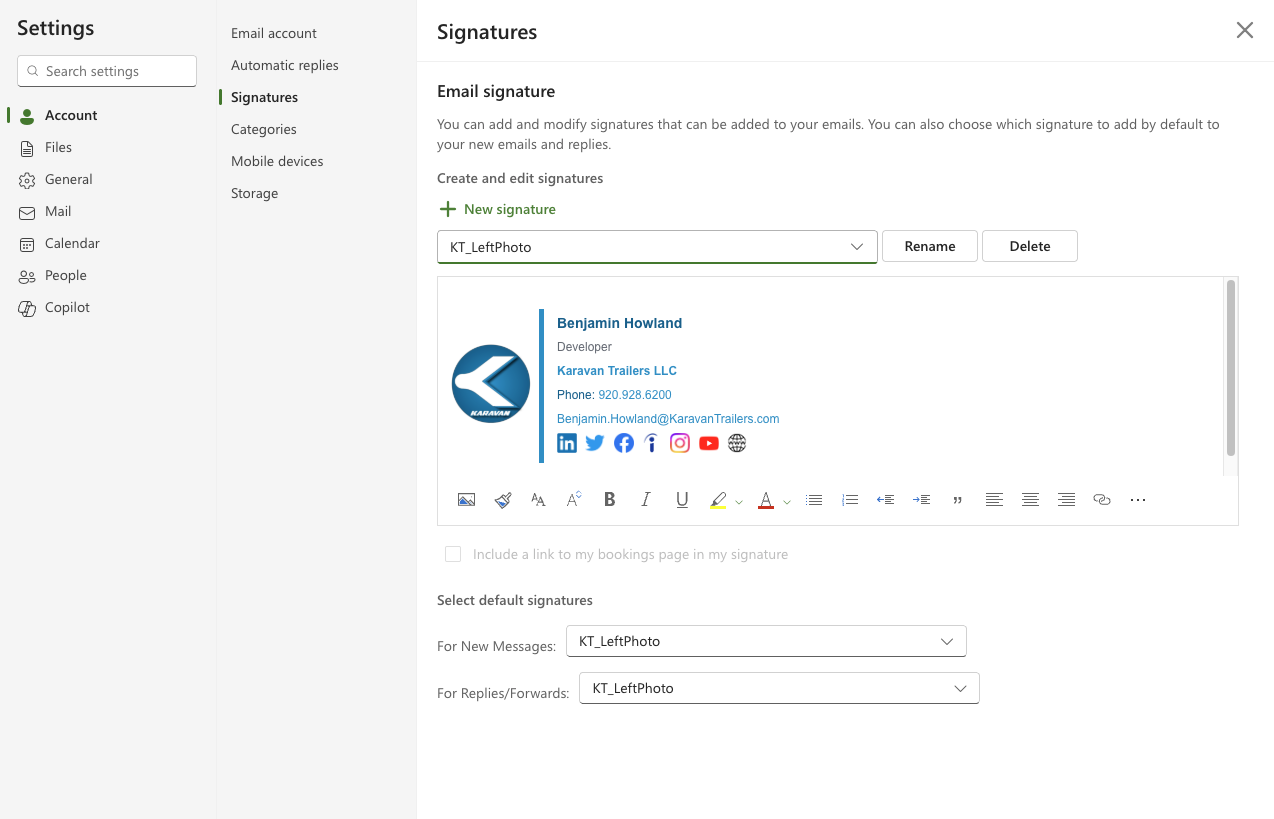
- Your email signature is now set up in the new Outlook for the web! You can test it by composing a new email and checking if your signature appears as expected. You should see your signature in the email body, complete with any images or formatting you included in the HTML code.
- Change your menu options For new messages and Replies/forwards to your new signature.